Adding Projects without the Project Wizard

Once you have selected the appropriate property, Click the Add button on the Toolbar. If your icon is different, then you must have the “Add Project Wizard” option activated and will need to uncheck it on your Utilities menu, otherwise the following screen will display:
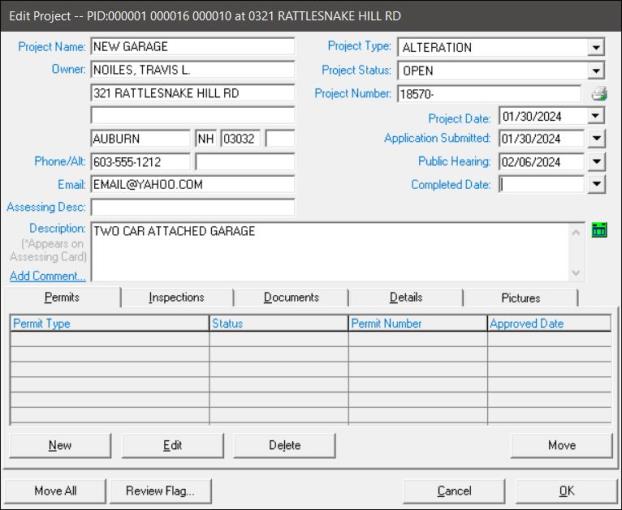
The system will auto fill the PID and property location from the Assessing database and these fields are not editable. The owner’s name and address information from the Assessing database will also be auto filled, but you can edit these, if necessary. You will need to select a Const. Type (construction type) and Status from the drop-down list boxes opened by clicking on the arrows to the left of each entry field. The options that display are based on the start up options provided at installation or the ones created by you through the Utilities Menu on the Permit/Inspection Setup option.
Select a Project name that is appropriate and relative to the project so it is easy find the Project via the query options or other search methods. Add a Project description as needed. Then click the OK button to save the Project. Once the project is saved, you can then select the new project and add new permits, inspections, or documents by clicking the appropriate tab and then clicking the New, Edit or Delete button as necessary.
Permits: Here you will Add Building Permits. Adding a new Building Permit and printing it will also send the data to the Assessor’s database. This is an important function that helps eliminate the need to send paperwork to the Assessor’s office, as well as eliminate the possibility of lost paper work between the two offices.
Inspections: Here is where you can add the necessary information for future inspections and notes or add the information from an inspection previously made.
Documents: This option is for entering associated documents and the document storage location, as well as specific notes.
Details: This is where you add census detail relating to a Project.
Pictures: Add pictures relating to a Project from digital images.
If the Permit # field is unavailable (grayed out) and filled with “AutoNumber” this means a function was set during installation which automatically creates sequential Permit Numbers. Otherwise, you will need to enter the Permit # and select the Permit Type from the drop-down list box, keeping in mind that only the Building Permit type when printed is electronically transmitted to the Assessor’s database.
If you have set up contractors via the Contractor Setup option on the Utilities menu, that data will be displayed as options if you click on the Contractor drop down arrow. Fill in the other data as needed. The estimated cost field is important to the assessor and will be transmitted to that office with the Building Permit data and may be helpful in the assessment of the new building, addition or alteration. Any notes, or at least the first 50 or so characters are also sent to the Assessor’s database. Clicking the Cancel button will cancel the Permit add. Clicking the OK button will save the data as entered and clicking the Print Permit button will display the Building Permit Summary to be printed, then click the print button on that screen to display the formal Building Permit. After review, close the window or click the printer icon to send to the printer.